
The labeller in 10 minutes
The labeller is where you listen and answer. This page takes you through one short session. The Labelling section covers each part in detail.
Two views
Section titled “Two views”The labeller has two views of the same dataset:
- Events: one event at a time. An event is any box on a recording: the model’s detections, imported boxes, and boxes people drew. You hear each one and say what it is. It is fast and works from the keyboard.
- Recording: whole recordings, start to end. You draw boxes around calls the model missed, adjust or answer the boxes that are there, and mark the recording.
You can move between them at any time in the same session.
flowchart LR
  start["Start screen"] --> events["Events: one event at a time"]
  start --> recording["Recording: whole recordings"]
  events <-->|"C / D, or the switch in the top bar"| recording
  events --> done["Done: releases what you hold, back to the dataset"]
  recording --> done
Open the labeller
Section titled “Open the labeller”Open a dataset and click Open labeller, or press L. On a new project’s home, Open labeller in the Start labelling step does the same.
The labeller fills the window, without the sidebar. The top bar shows the dataset’s title on the left. Click it to go back to the dataset.
Choose how to label
Section titled “Choose how to label”The start screen asks “How do you want to label” followed by the dataset’s title.
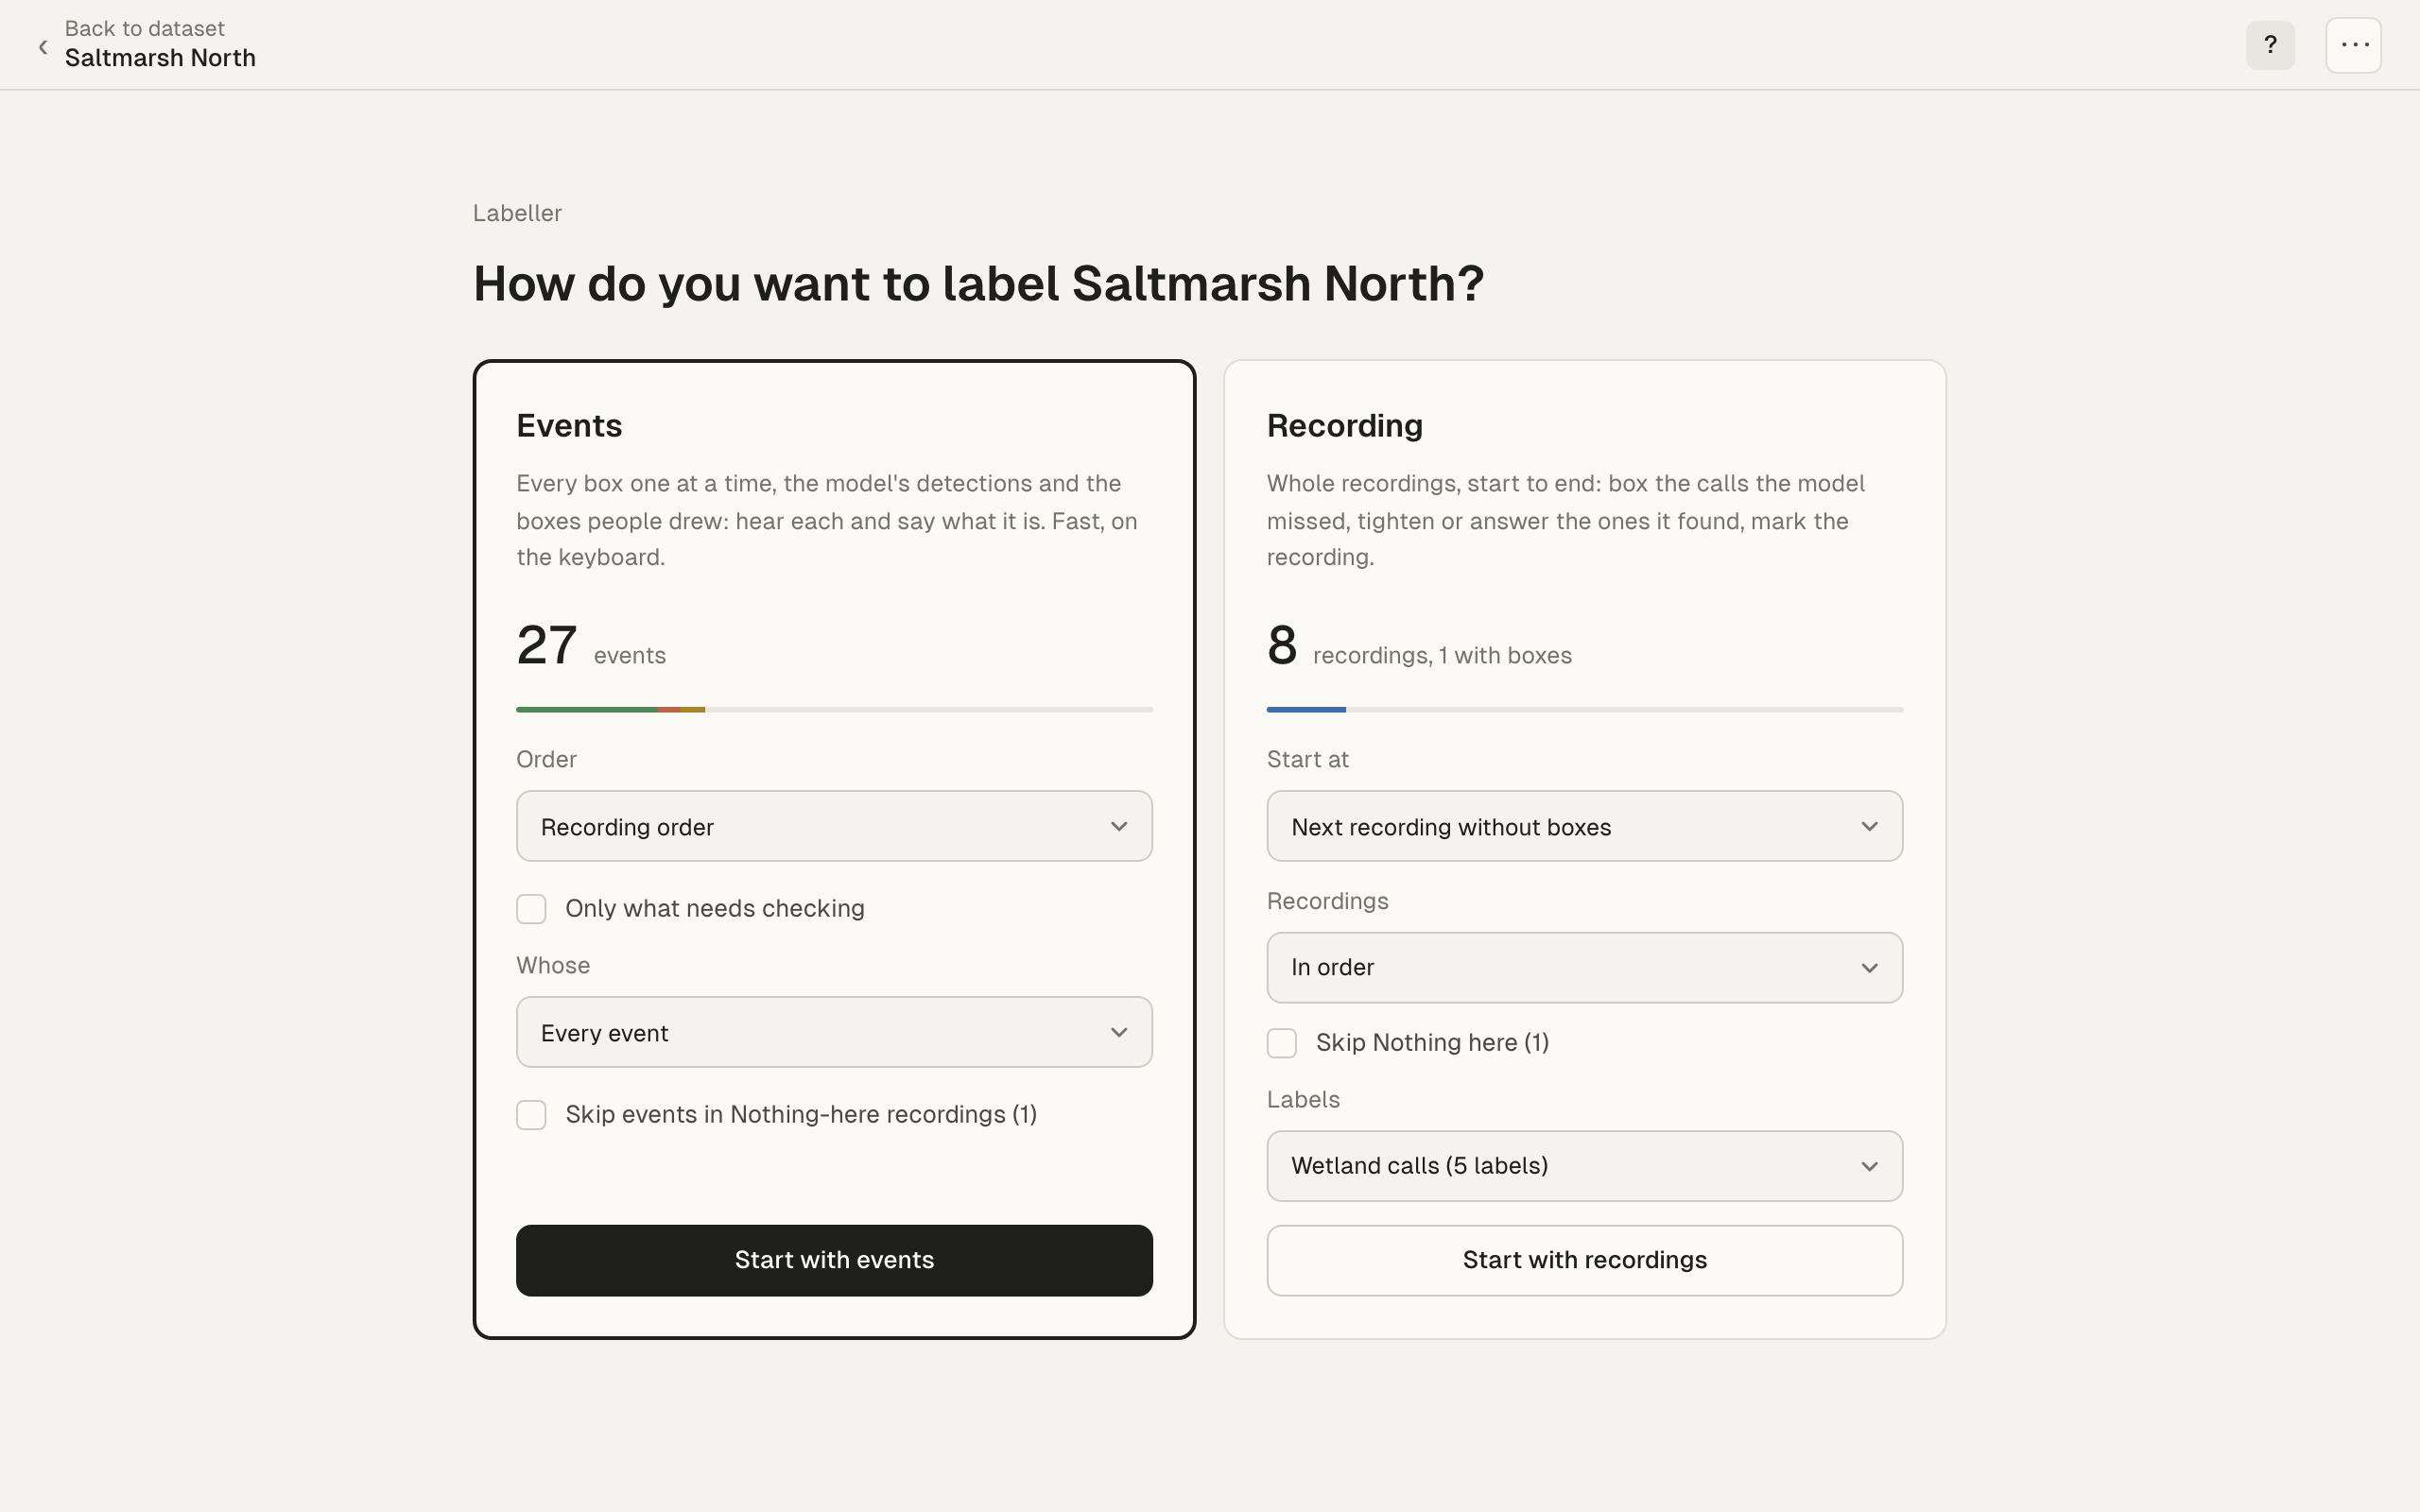
The Events card shows how many events are left, and lets you set:
- Order: Highest confidence first, Lowest confidence first, Recording order or Random order.
- Only what needs checking: events nobody has answered yet. Untick it to see every event.
- Whose: Every event, The model’s detections, or Boxes people drew.
The Recording card shows how many recordings there are and how many have boxes, and lets you choose where to start.
Click Start with events or Start with recordings. From the keyboard, press C for Events or D for Recording, then Enter.
If the dataset has no events yet, Sift skips this screen and opens Recording, because drawing boxes is all there is to do. Apply a model first if you want events to answer. See Apply a model and map its output.
Answer a few events
Section titled “Answer a few events”In Events, Sift shows one event at a time. Under Label, answer with one key:
| Key | Answer |
|---|---|
| 1 to 9 | One of the dataset’s labels, in the order shown |
| Enter | The event’s current label, which is marked as the suggestion |
| 0 | Nothing: there is nothing of interest there |
| U | Unsure: you can’t tell |
Each answer is saved and Sift moves on to the next event. You can also click the answers.
Other keys you will use straight away:
| Key | Does |
|---|---|
| Space | Play or pause |
| A | Turn auto-play on or off, so each event plays when it opens |
| → or S | Next event, without answering |
| ← | Previous event |
| N | Write a note on the event |
| ⌘Z (macOS) or Ctrl+Z | Undo your last answer |
Answer five or six events. The counter in the top bar shows where you are.
Draw a box
Section titled “Draw a box”Press D, or click Recording in the top bar’s switch. Recording shows a whole recording as a spectrogram.
- Drag across the spectrogram around a call. The box appears and is selected.
- Press a number from 1 to 9 to give it a label. With no box selected, the number sets the label your next boxes get.
- Press P to play only the box’s frequency band, to check it.
A box you draw counts as your answer: it says “this is that label”. To change it, select it and press another number. To remove it, press Delete. ⌘Z or Ctrl+Z undoes your last box change.
Press ← and → to move between recordings.
Mark a recording
Section titled “Mark a recording”A mark says something about a whole recording. Press Esc first to clear the selection: with a box or event selected, these keys act on it instead.
- Press I to mark it Of interest.
- Press 0 to mark it Nothing here.
- Press Shift+I to add a note to your mark.
Press the same key again to withdraw a mark. You also find these in the top bar’s menu (⋯). Marks help later: the start screen can show recordings marked Of interest first, and skip recordings marked Nothing here.
Finish
Section titled “Finish”Open the top bar’s menu (⋯) and choose Done. Sift takes you back to the dataset. In an organisation project, Done also releases the events you were holding, so colleagues can take them.
Everything you did is already saved. There is nothing else to save.
When you get stuck
Section titled “When you get stuck”Press ? at any time to see every key the current view answers to, with tips. The keys differ between Events and Recording. For example, ← and → move by event in Events and by recording in Recording. The full list is in Keyboard shortcuts.
The welcome tour
Section titled “The welcome tour”The first time you open Sift, a short tour may start by itself. It does when you have no project yet, when the open project has no datasets, or when you open an organisation project. Each step is a small popover next to the thing it is about. You do the step in the app itself.
The tour has five steps:
- Create a project.
- Add a dataset from a folder, with a label set so you have labels to answer with.
- Open the labeller and draw a box.
- Answer an event or mark the recording.
- Share the work. In an organisation, ask a colleague about an event or recording. On your own, publish a version.
A step moves on by itself when you do what it asks, or press Next. When the tour starts by itself, it skips steps that are already done, such as Create a project when a project is open. It also skips steps that are not yours to do: if you can’t add datasets to the project, Add a dataset is skipped. Press Skip tour to close it.
To take it again, open the account menu at the bottom of the sidebar and choose Take the tour. It starts again from the first step.