
Join an organisation as a labeller
Someone in your organisation invited you to label with them. This page takes you from the invitation email to your first answers. Do the steps in order.
flowchart TD
  email["1. Accept the invitation"] --> app["2. Get the app"]
  app --> signin["3. Sign in from the app"]
  signin --> project["4. Open the project"]
  project --> work["5. Find your assigned work"]
  work --> answer["6. Answer events"]
  answer --> requests["7. Check requests sent to you"]
1. Accept the invitation
Section titled “1. Accept the invitation”The invitation comes by email. Its subject says who invited you, for example “Sift: Declan Byrne invited you to join Fathom”. It may include a note from them.
Click the link in the email. It opens your organisation’s hub web app in a browser. The link works for 7 days and only once.
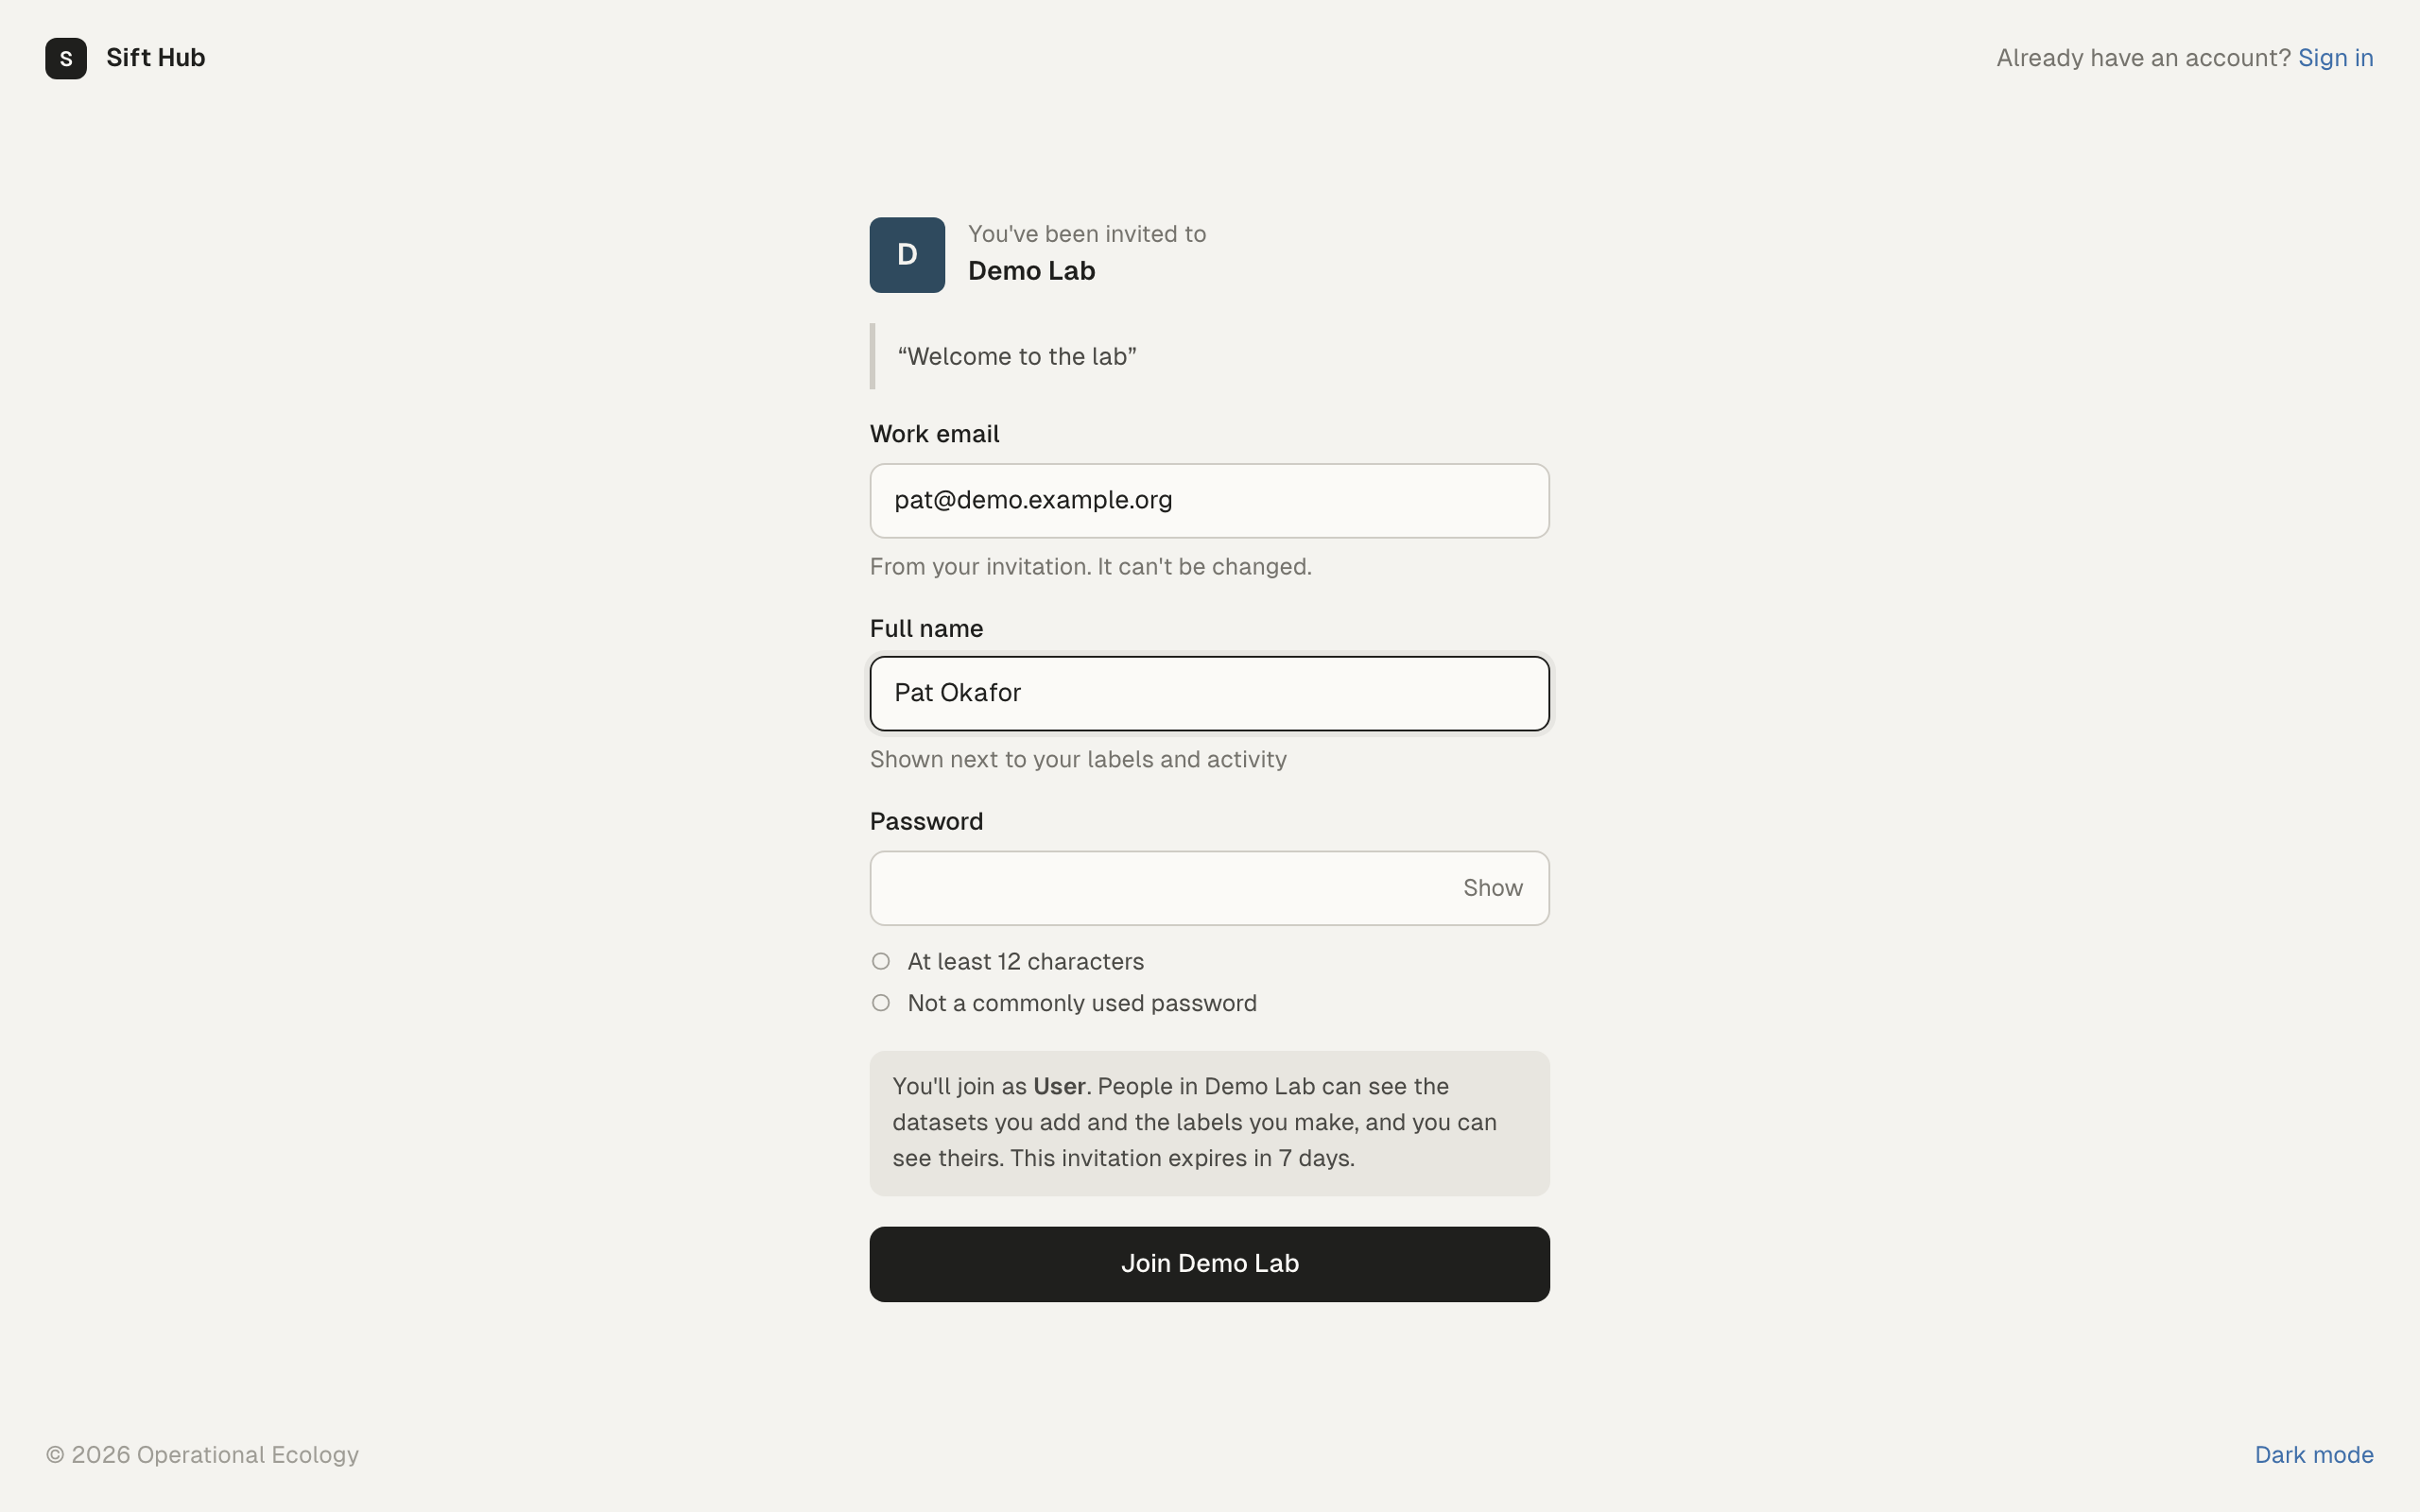
- Check Work email. It comes from the invitation and can’t be changed.
- Type your Full name. It is shown next to your labels and activity.
- Choose a Password. The list under it shows which rules it meets.
- Click Join followed by the organisation’s name.
The screen then says “You’ve joined” and the organisation’s name. You don’t need to stay in the browser: labelling happens in the desktop app.
If the invited address already has an account, the screen asks for your password instead of a name. If it doesn’t, and you want to join with an account you already have, click Sign in at the top of the screen. If you are already signed in to the web app as someone else, sign out, then open the link again.
You can also accept in the desktop app. See Accept an invitation.
If the link doesn’t work, the screen tells you why:
- “This invitation has expired”: ask the person who invited you to resend it. You get a new link.
- “This invitation was withdrawn”: an admin cancelled it. Ask them to invite you again.
- “This invitation has already been used”: sign in with the account you created.
- “This invitation link isn’t valid”: open the latest invitation email you received, or ask your admin to resend it.
2. Get the app
Section titled “2. Get the app”Sift isn’t offered as a public download. Get the installer from your organisation:
- Open your organisation’s hub web app and look under the sign-in form for “Labelling happens in the desktop app” and the Get the app link. It opens where your organisation keeps the installers, usually the hub’s download page, which offers the installer for your computer first.
- If there is no Get the app link, ask your organisation’s administrator for the installer.
Then install it as described in Install Sift.
3. Sign in from the app
Section titled “3. Sign in from the app”Open Sift. The first screen asks you to sign in.
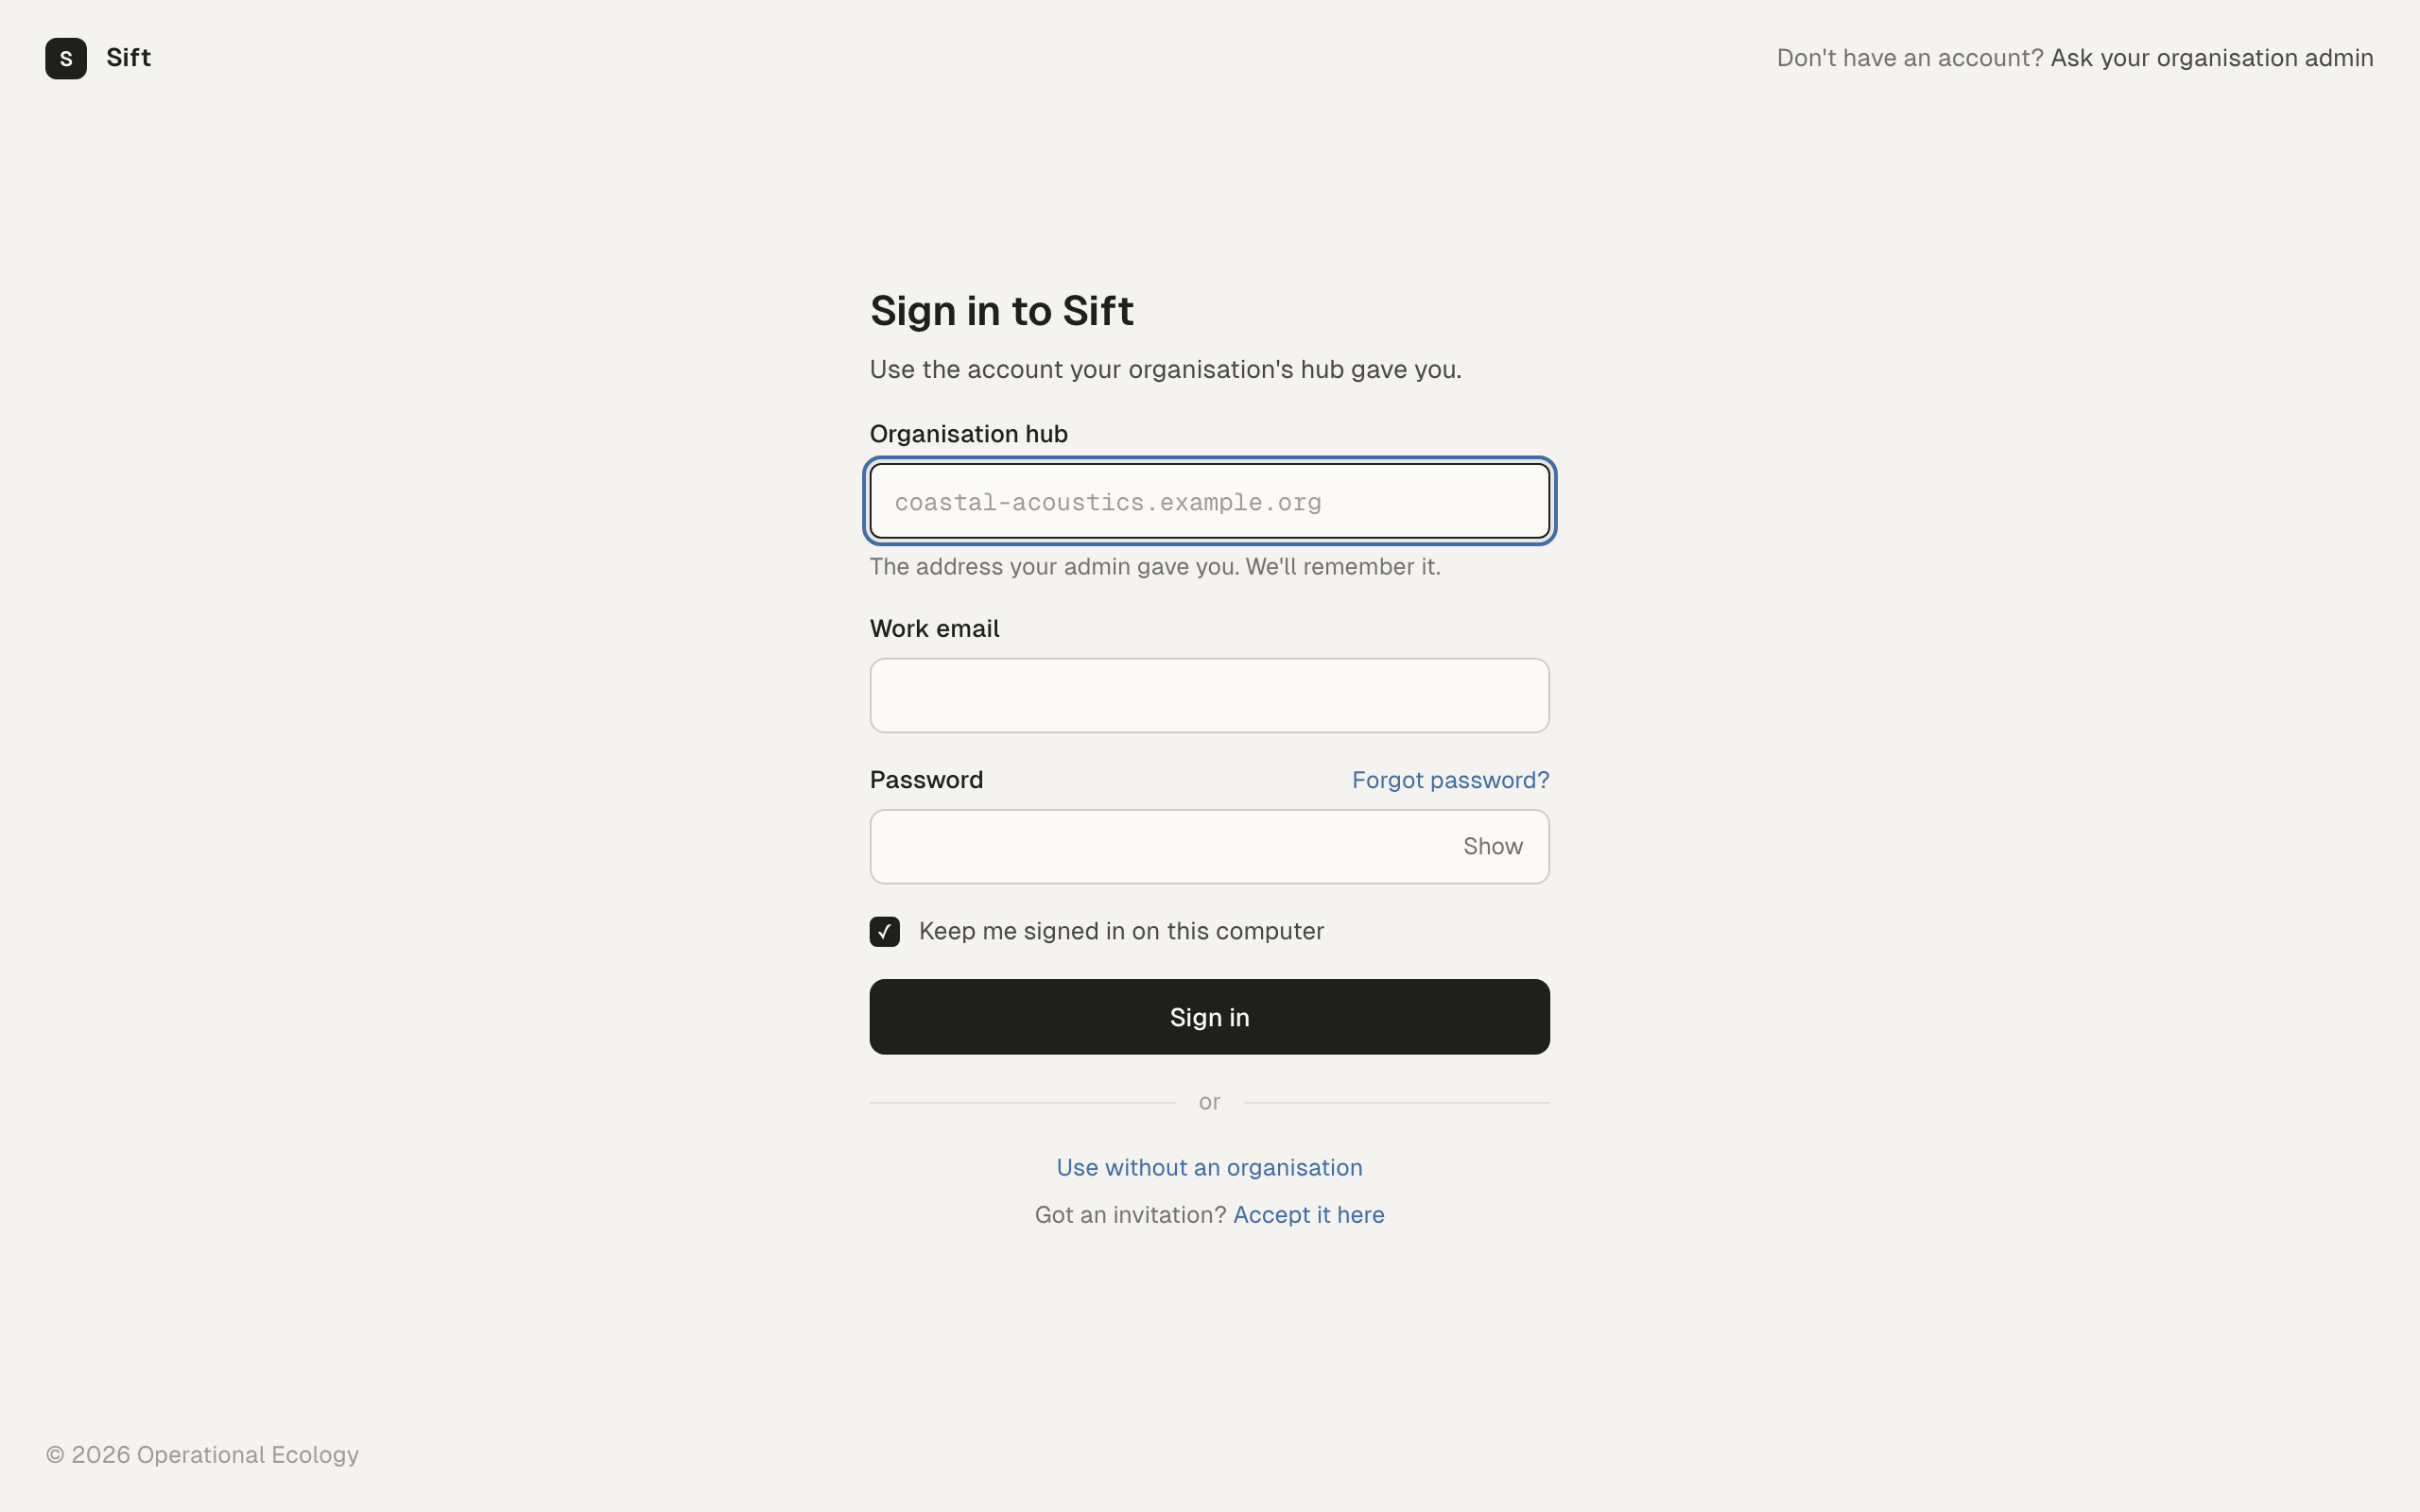
- In Organisation hub, type your organisation’s address. It is the start of the link in your invitation email, for example
sift.fathom.operationalecology.io. You can leave outhttps://. - In Work email, type the address the invitation was sent to.
- Type the Password you chose in step 1.
- Click Sign in.
If you belong to more than one organisation, Sift asks you to choose one.
Don’t choose Use without an organisation. That opens personal projects on this computer only, and your colleagues won’t see your work.
4. Open the project
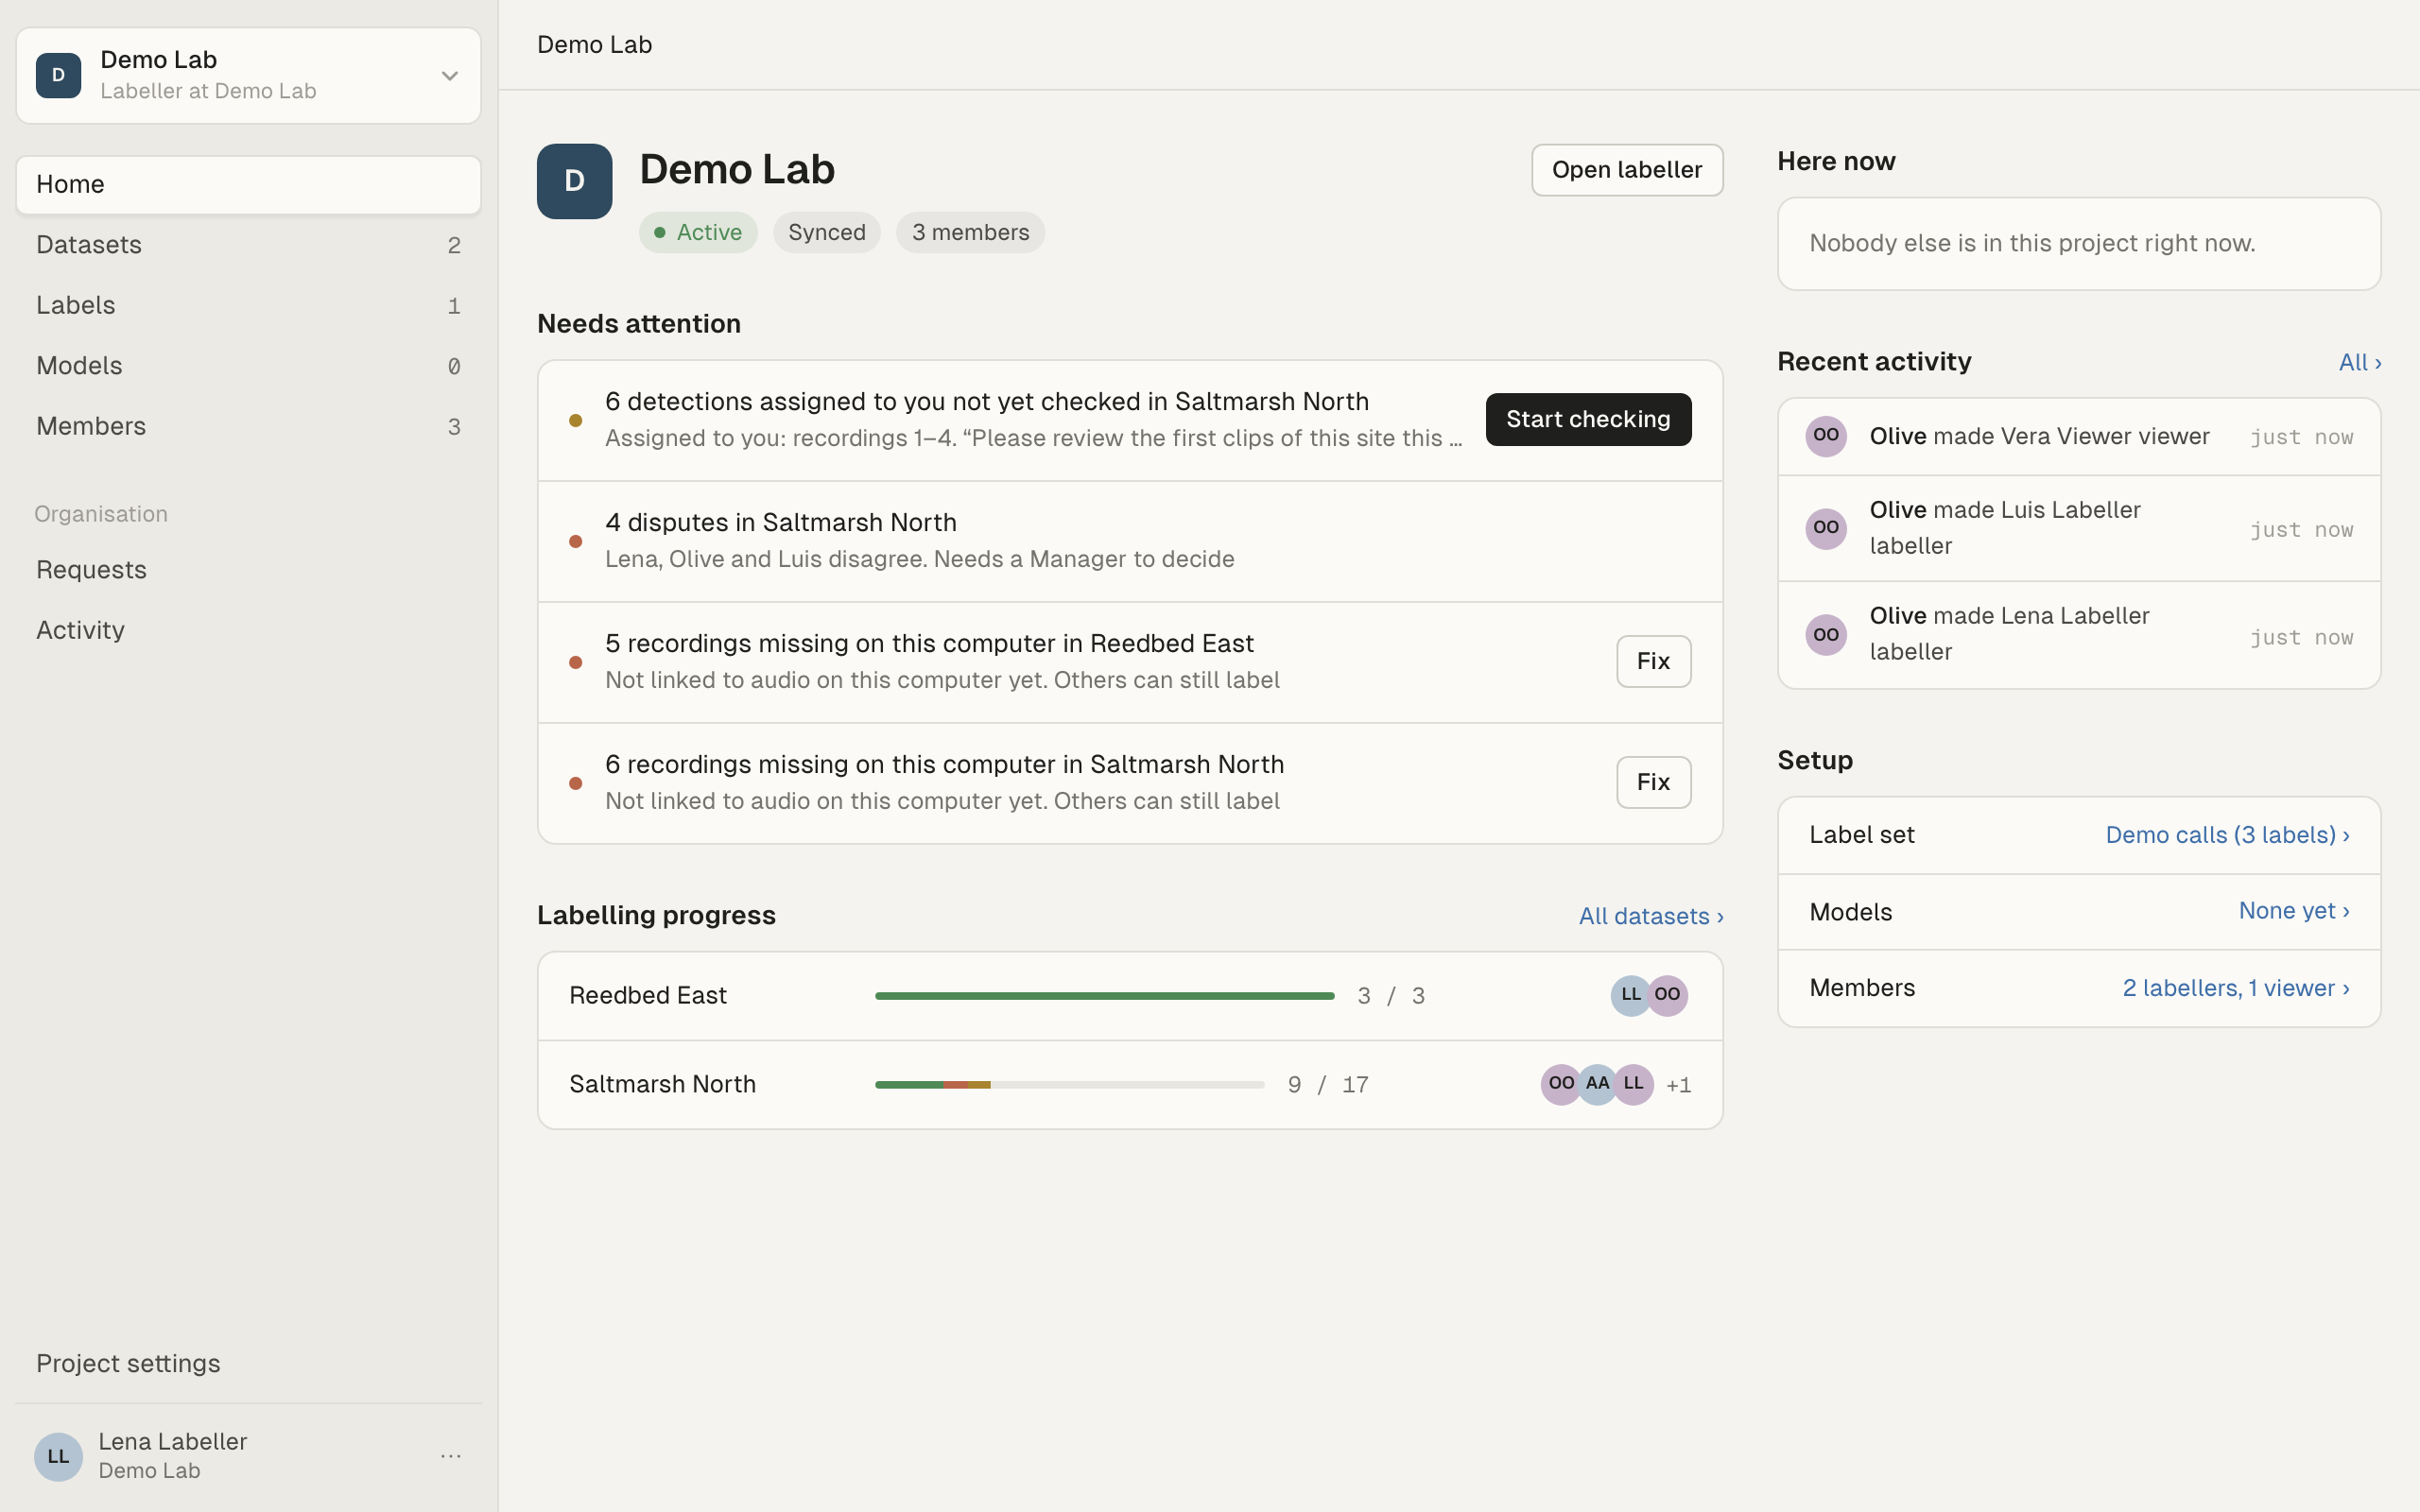
Section titled “4. Open the project”The project you work in is chosen at the top of the sidebar. The line under its name says your role, for example “Labeller at Fathom”.
To open another project, click the project’s name at the top of the sidebar, then click the project in the list. Type in Find a project to filter a long list.
You only see the projects you are a member of, and projects open to everyone in the organisation. If the project you expect isn’t there, ask its manager to add you. See Projects, members and roles.
The first time you sign in, Sift has to sync your organisation’s projects before it can show them. While it does, the sidebar shows your organisation’s name with “(not synced yet)”, for example “Fathom (not synced yet)”. The page says “Getting Fathom’s projects… they open here after the first sync”, followed by the sync state. When the first sync finishes, Sift opens the first project you can open.
If you aren’t in any project yet, both messages stay after the sync. The sidebar still says “(not synced yet)” and the page still says it is getting the projects. Ask a manager to add you to a project.
The project’s Home lists what needs you under Needs attention: the work assigned to you first, then other unchecked events you can label, disputes (a manager decides them), requests for you, and recordings whose audio Sift can’t find on this computer.
The audio
Section titled “The audio”Your organisation’s hub never holds audio. Each person’s app reads recordings from their own drives, shares or Google Drive. If a dataset’s recordings aren’t on your computer yet, Sift says so and you can’t listen until it finds them. Ask your manager where the files are, then see Missing audio and finding it again. For datasets on Google Drive, see Google Drive datasets.
5. Find your assigned work
Section titled “5. Find your assigned work”A manager may have assigned you part of a dataset. There are two ways to start on it:
- On the project’s Home, under Needs attention, click Start checking next to the work assigned to you.
- Open the dataset and click Open labeller. The start screen lists your work under Assigned to you, with its progress.
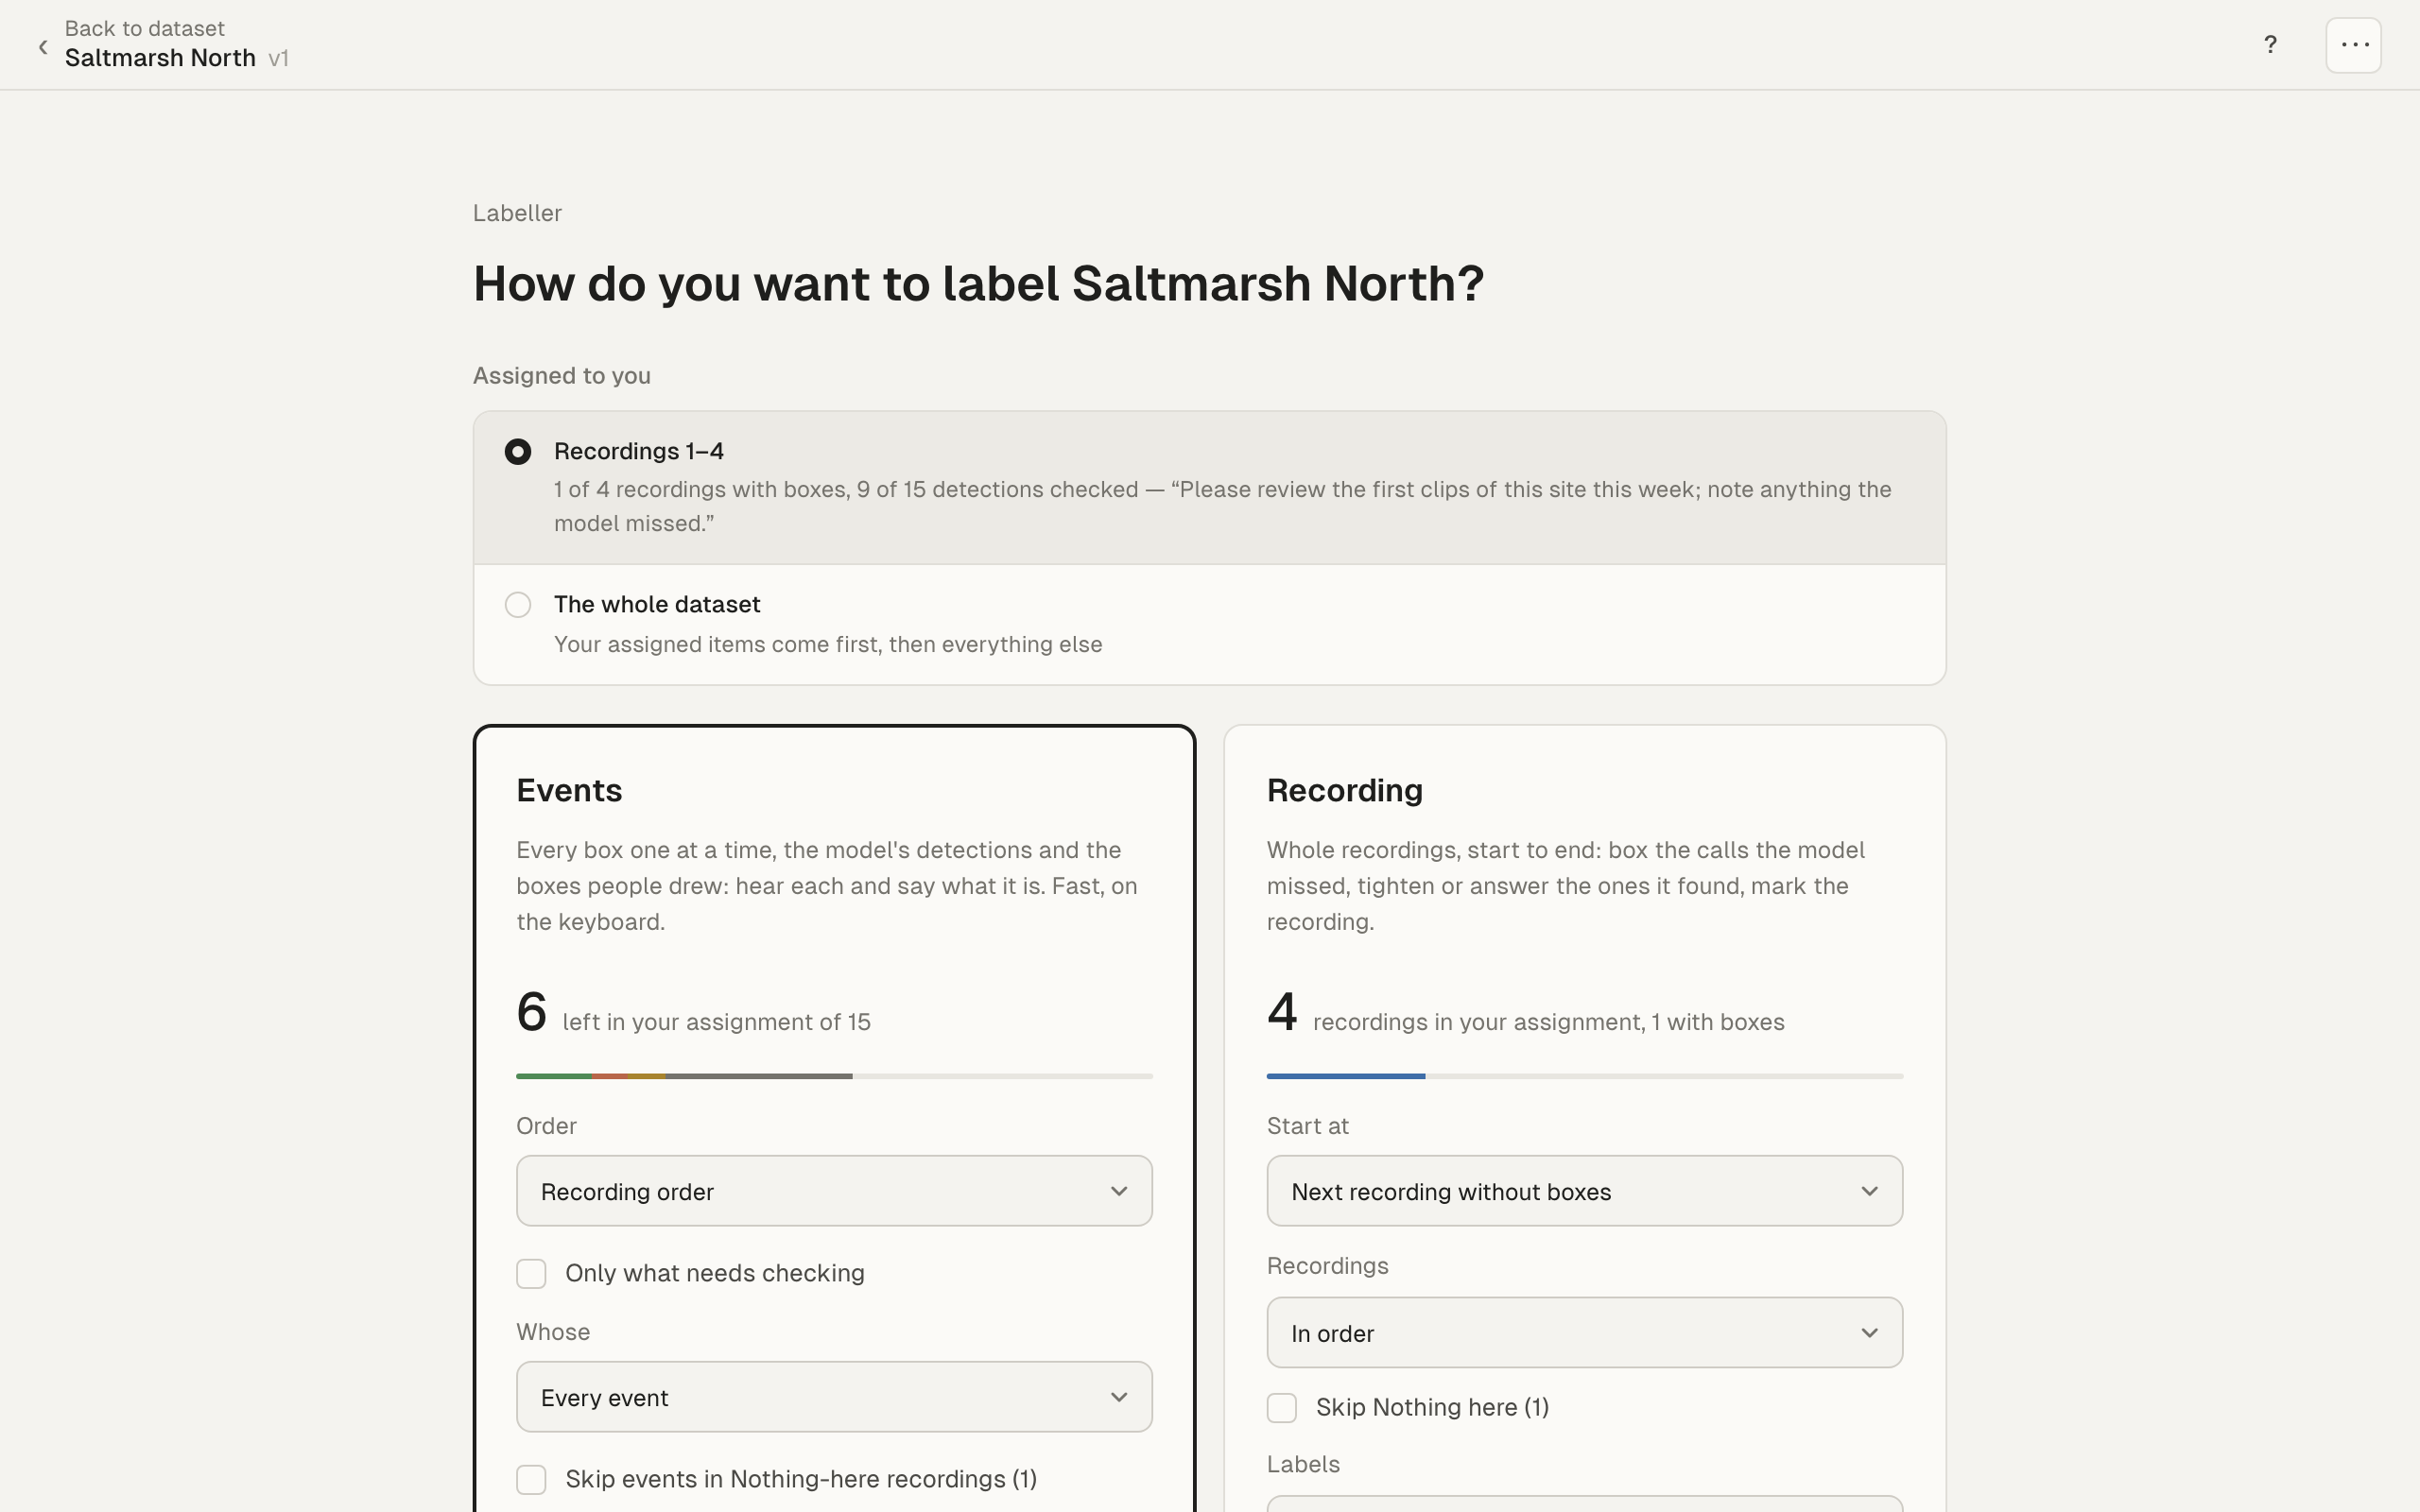
Your first assignment is chosen. Choose The whole dataset to label beyond it: your assigned items still come first. An assignment may set the order for you. Then Order and Only what needs checking are greyed out.
No assignment? Open any dataset you can label and start there. More in Assignments.
6. Answer events
Section titled “6. Answer events”An event is any box on a recording: the model’s detections, imported boxes, and boxes people drew. In the Events view you hear each one and answer:
- Choose a label from the Label grid, or press 1 to 9.
- Press 0 for Nothing: there is nothing of interest there.
- Press U for Unsure: you can’t tell.
Each answer is saved and you stay on the event. Press → (or the next button) to move on. To move on automatically, turn on Next event after labelling in the top bar’s menu (⋯). In the Recording view you can draw a box around a call the model missed. A box you draw is your answer.
Your answers sync to the hub. Other people’s answers never overwrite yours. When answers disagree, the event shows as disputed and a manager decides. See Disputes and settling them.
When you stop, open the top bar’s menu (⋯) and choose Done. That releases the events you were holding so colleagues can take them. If you close your laptop instead, they lapse after about 10 minutes.
For a full walk-through, see The labeller in 10 minutes.
7. Check requests sent to you
Section titled “7. Check requests sent to you”Colleagues can ask you to look at particular events or recordings. This is “Ask a colleague”.
Choose Requests in the sidebar, under Organisation. The number beside it is how many requests are waiting for you. The For you tab lists them. Click Review (or Continue, if you have started it) to open one and answer its events.
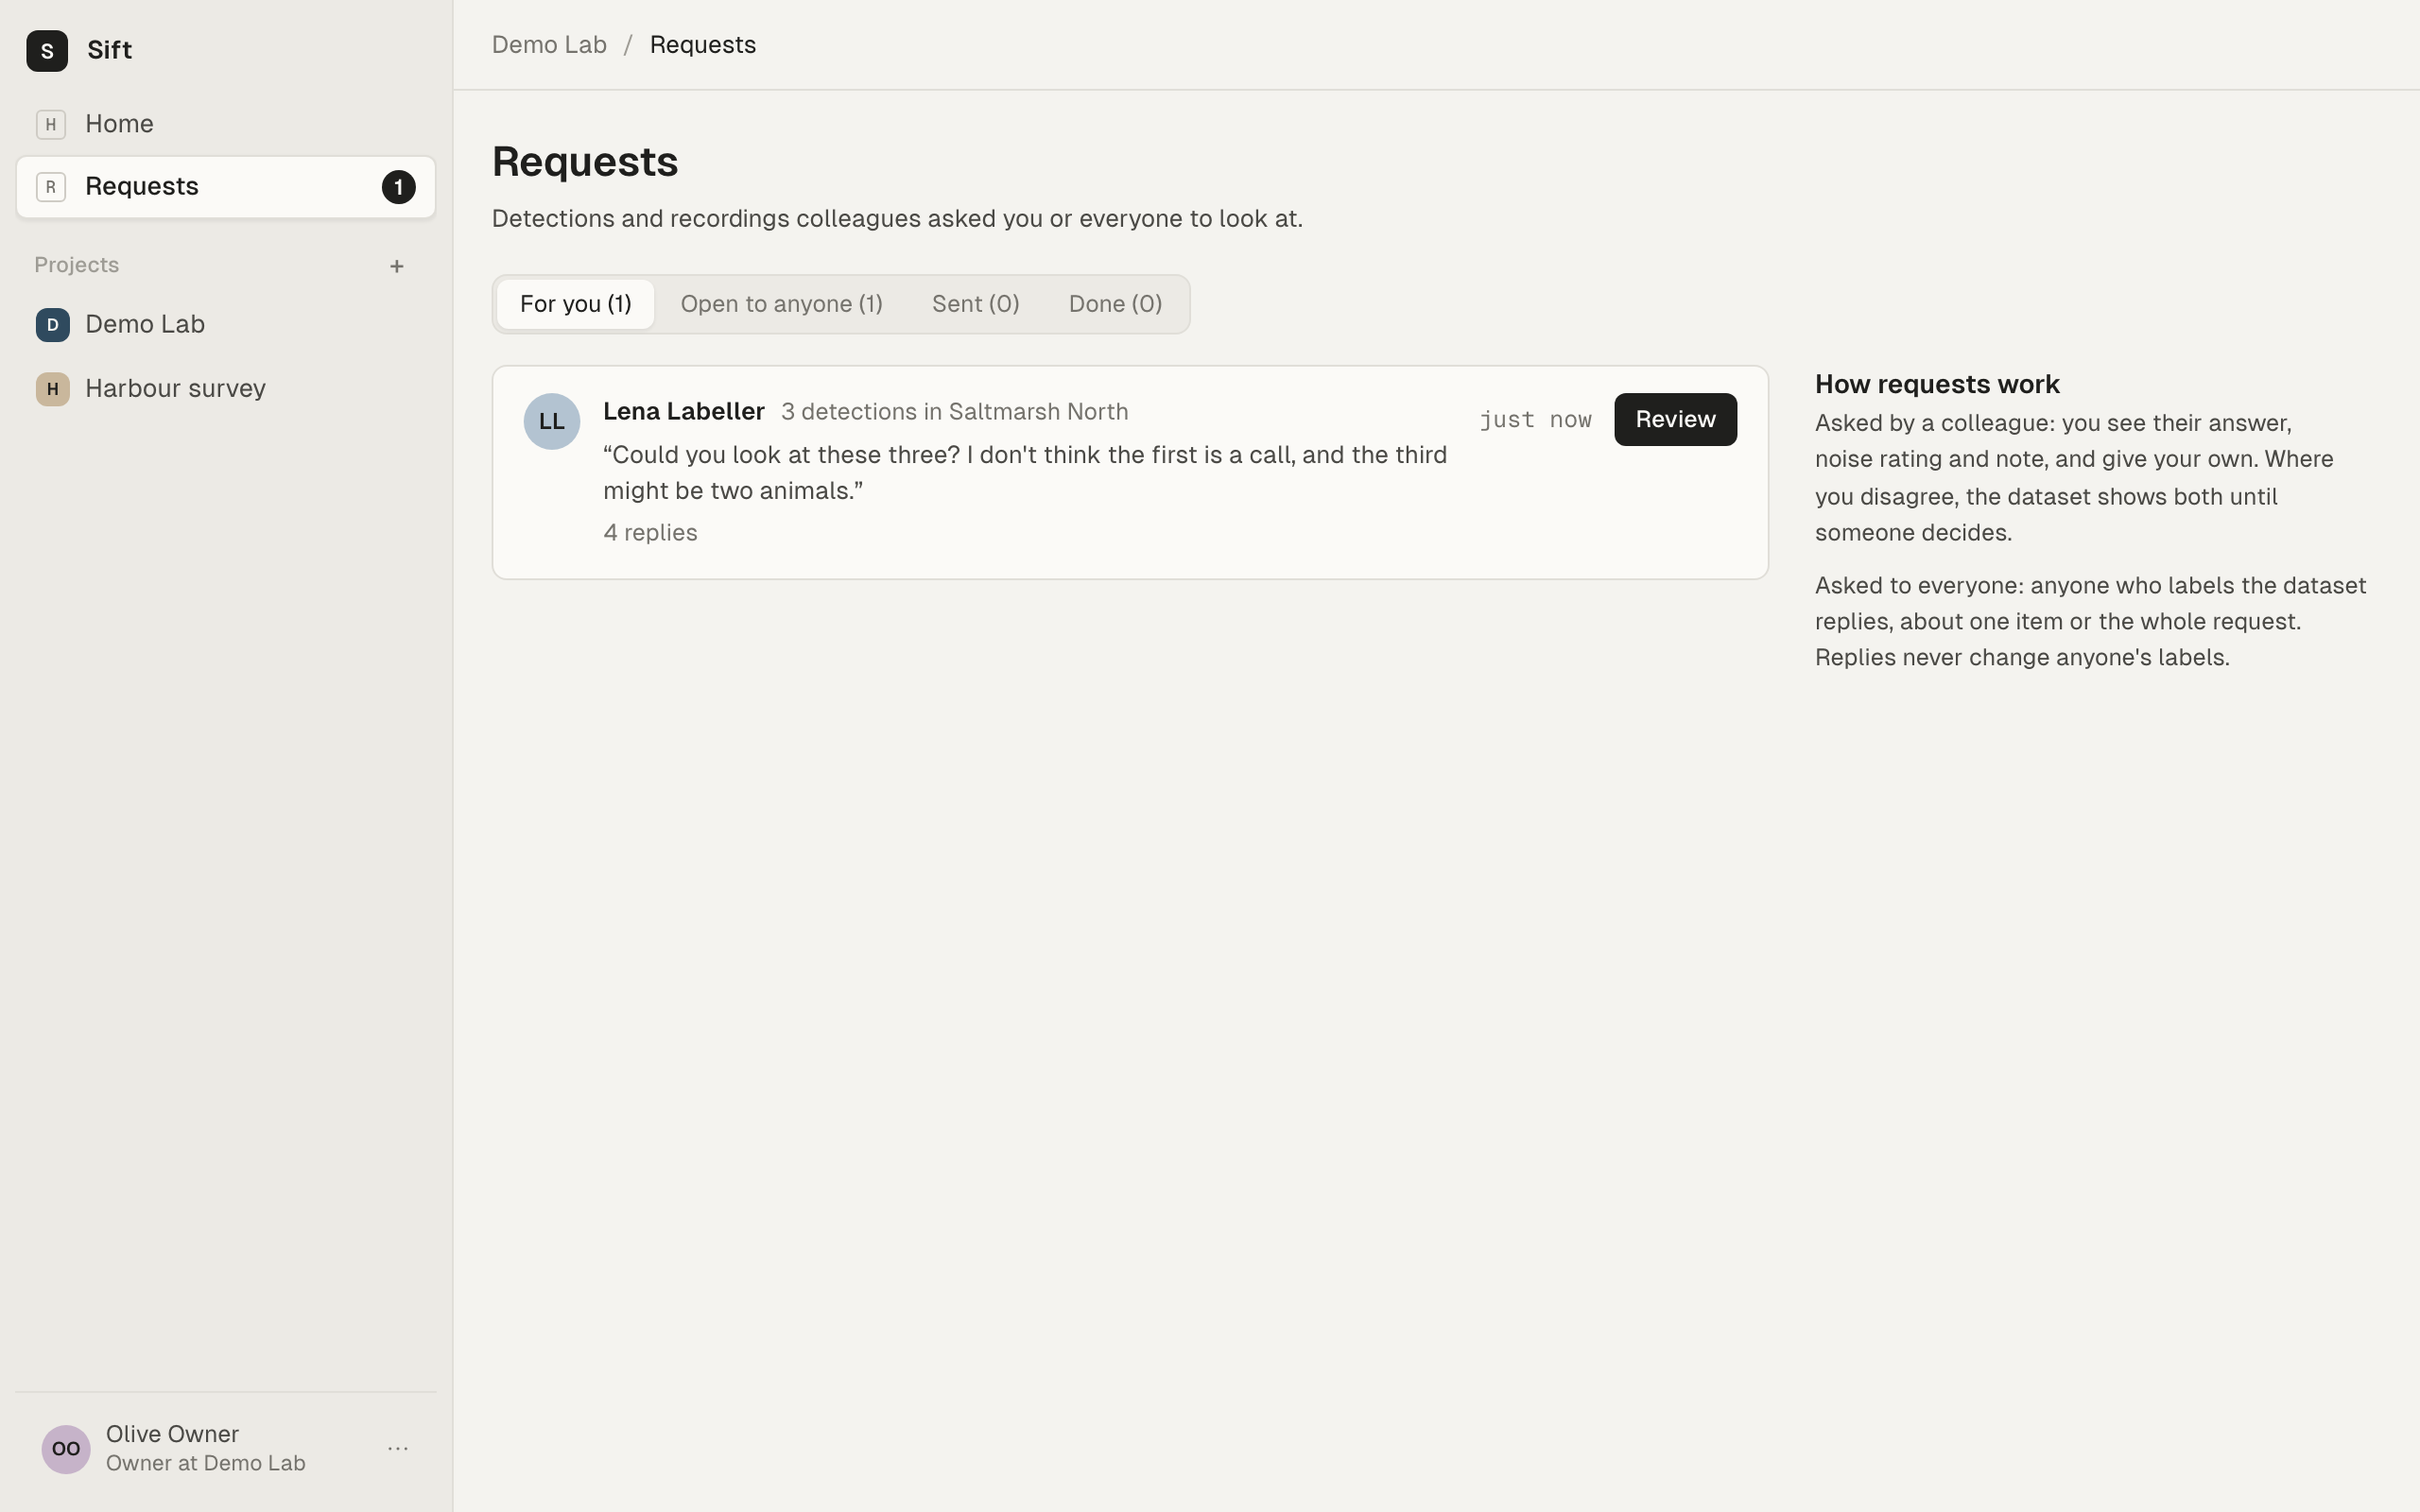
Requests for you also show on the project’s Home under Needs attention, with Review.
The hub web app shows the same requests, but you can’t answer them there. Answering needs the audio, so it happens in the desktop app. More in Ask a colleague.
Working offline
Section titled “Working offline”You can label without a connection. Your answers are saved on your computer and sync when the hub can be reached again. While you are offline, the project’s Home says so, and requests and who is here come back when you reconnect. See Organisations, the hub and sync.